I've decided to round out October with an update on all things Faux here in WA. Its been a busy month, between finally being able to field a painted crew, my first tournament, getting some games in against book 4 crews and starting my next terrain project.
October started well when I received my beautifully painted crew back from Blue Table Painting. This one activity had been consuming most of September and had meant I'd made little or no progress on anything! Then this big shiny parcel turned up and it all went mad...
I signed up for and played in my first tournament, a 35ss single faction affair which was something of a gaming splurge. Between working a twelve hour day, and then going to club as normal, before heading out on four hours sleep for a day of Malifaux goodness. In hindsight it wasn't a solid, or a cunning plan, which explains some of my performance on the day. Nonetheless I'm delighted with my first tournament experience and I can't wait for more.
Then came my Friday night regular games and plotting. In the run up to the Tourny I'd spent time with Mr Neverborn playing through the scenarios and generally listening as he recited the cheese that seems to permeate every Neverborn list. He did however give me some good guidance for a couple of the strategies and may have inadvertently given away some of his diabolical plans in the process.
We also waited with baited breaths for the arrival of our Gencon packages, which of course meant mine turned up last. In fairness, because I'd ordered both books 1.5 and 4, it was much heavier than most that we received.
Gencon sent Mr Arcanist into a tail spin with the arrival of his Mei Feng boxed set. When he wasn't drilling holes up north, he was battling it out and trying out the combos that Miss Feng brought to the board. It was definitely a learning time for him and his first couple of games were big defeats, but he persevered and now has most of her dirty tricks mastered, certainly the rail golem/gamin combo tore a hole in my Resser lines towards the end of the month and I was left wondering how I'm going to address the crews defensive capabilities next time.
October also gave me a chance to take Seamus into a starter league organised by our local henchman. I suffered two crushing defeats at the hands of Mr Neverborn, (this me time fielding Zoraida) and Mr Henchman who brought the Hoff brick to the tabletop. I like to think I gave our henchman a bit of a run for his money, but ultimately looking back, he didn't use his soul stones for anything other than initiative flips, so maybe he was taking it easy on me. I'm still trying to organise my last game in the starter league, this time vs Sonia, so I'm not hopeful of a win there either.
October was also my first foray into Kickstarter projects when I chose to back 'impudent mortals' MDF puzzle terrain project. I saw a couple of his buildings as fitting in quite nicely for my planned Arcanist board and thankfully Mr Fantasy thought the same, so we're going halves on a 12 building deal, which will easily give me enough to build my rail/industry board.
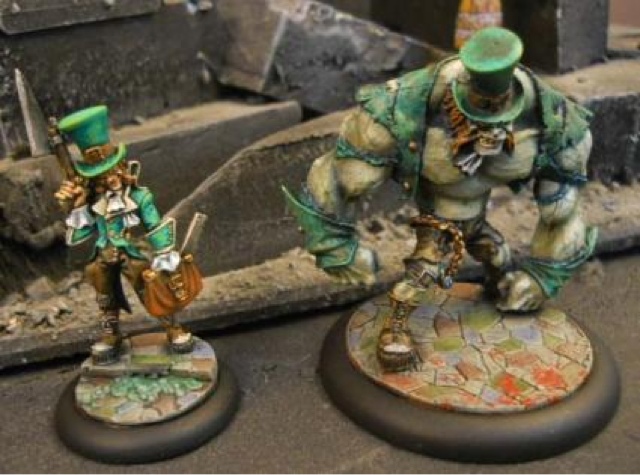
I added Alt Nico, Mindless zombies, a vulture and some necro punks to my pile of shame this month, as well as some badlands terrain from gale force 9. To try and balance the scales I've almost finished assembling my Kirai crew and have made a dent by promoting two of four boxes of GF9 crystals from my pile to my paint station.
Lastly came my second terrain project for Malifaux. I'd already created a Resser board that sees regular usage at my local club. Now it was time to expand on my original plan by building a board for each of the factions. Next up is a Neverborn themed board, specifically crystal canyons, my homage to a trip through badlands national park many years ago. It's been good to pickup the paint brush again and you can read more on how that project turned out, or how things went in any of the other subjects I've mentioned by flicking through October 2012 in the index of doom.
Onwards to November!
Tuesday 30 October 2012
Monday 29 October 2012
Hobby Project - Shady Rest Cemetary
So I've already admitted that my crew was commission painted by Blue Table Paint but just to prove that I have some talent and because I'm currently starting another Malifaux board project, I thought I'd share pics and information on my first project, Shady Rest Cemetery.
Inspired by the short story 'Confessions of an Aspiring Resurrectionist', which is coincidentally the inspiration for this blog name, I wanted to recreate the feel and experience of playing in a cemetery. In Malifaux that opens up special rules for graveyards, tombstones and creepy structures.
For this project I've used:
- GW Garden of Morr set
- 2 x GW WHFB fences set
- GW Scenery trees set
- 12 x GW biker bases
- 9 x GW terminator bases
- 2 x Rendra grave stone sets
- Low fire clay for shaping up grave mounds
- Fine basing sand
I can't take credit for this one all myself, my wife spent as many hours on this as I did, and has gone on record as saying that if she EVER had to paint another skull I'd be 6ft under pushing up daisies. I'd also like to thank William for teaching me about low fire clay and helping me with grave sculpting.


Close ups


Tournament Report - Skulls 2012
Skulls 2012 is one of the few tournaments in our local calendar and this year I decided to take the plunge and take part in my first tournament. Hosted by our local henchman and one of local clubs here, this was a 35ss domination format event where only the faction was fixed.
All encounters would use shared strategies that included reconnoiter, treasure hunt, claim jump and destroy the evidence and we were only allowed to use shared schemes once throughout the tournament.
I started preparing for this almost four months ago and yet on the day, very little of that preparation actually paid off. My preparations included:
- Getting my crew assembled and sent off for commission painting
- Printing and assembling counters and gaming aids
- Re-reading the core rules
- Theory hammering every strategy
- Lots of practice games
- Acquiring a display board
- Working out the optimum schemes for each strategy
- Working on my timings and getting faster at my game
And despite all that, there's two pieces of preparation I consciously skipped and were by far my greatest downfall. Firstly I should have spent some time familiarising myself with other crews, when I faced Pandora for the first time I should have known what she was capable of, and I should have been able to have spot Snowstorm, Niño and Papa Loco had the threat potential to change my game. Secondly I should have got more sleep, an unfortunate side effect of having two young dogs and having to attend my gaming club the night before.
Nonetheless I took best in faction - largely because there were no other Resser players.

I also took best sport, probably because I came last, but also because despite it all, I had a massive grin on my face from start to finish, because let's face it a day of Faux should put you in a good mood!

Game 1 vs Jons Pandora crew playing shared claim jump
What should have been the perfect crew to hit whoever got to the centre of the board, was turned back and barely got a shot off against avatar pandora. I only managed to score any points in the last activation of the game, when I charged Seamus into Lilitu, killing her, netting me kill protégée ,and denying Jon a couple of VP's by being close to the claim jump.
Result was 6-2 to Jon.
Game 2 vs Peters Rasputina crew playing shared treasure hunt
I'd theory hammered this one to death and when I got first activation I launched sybelle forward, called a belle and picked up the treasure. I figured I'd last the turn against raspys high damage output and then safely be able to escape to my deployment zone. I hadn't appreciated snowstorm was a spirit and he just popped up pinning my belle and slaughtering sybelle in one foul swoop.
I managed to get grudge off but Peter secured the treasure and had killed sybelle to get kill protégée off.
Another loss for me.
Game 3 vs Daves Perdita crew playing shared reconnoiter
I really wasn't thinking to well during this lineup and I lost my night terrors and Seamus early on despite inflicting a couple of casualties. It became a running game, trying to avoid a Perdita / executioner combo and came down to having to use a couple of canine remains to try to fend off granny Ortega.
I burnt both skulls stones in this game, and they netted me a black joker and a 1 in fairly critical flips!
Another loss for me.
Game 4 vs Daves Perdita crew playing shared destory the evidence
In the best game of the day for me, I pulled a draw against a papa loco and pale rider combo using Seamus, dead rider, night terrors and a dead doxy. Seamus denied Dave the win by popping fresh belles right over his last evidence marker to keep Perdita busy just long enough. My dead rider bought it very early on, but snagged one evidence marker for me. Meanwhile my night terrors were running round like a benny hill chorus line trying to keep out of weapons range, until I turned round and charged and temporarily blinded Santiago. Papa Loco very nearly ended three of my crew when he decided to 'take ya with me', meanwhile my dead doxy powered into Daves deployment zone, chasing the watcher with her derringer drawn.
Friday 26 October 2012
Ultra Combos - Seamus's switcherroo
Ultra Combos is my way of noting down and acknowledging the synergies of my Resser Brigade, it'll form an infrequent set of updates that might help the Aspiring Resurrectionists out there to finally win a game.
Ultra Combos are things I've tried and have worked well for me, I only intend to publish here as I use some of the synergies of my crews, this isn't a tactica hammering exercise, everything here has been tried and tested.
So onto combo 1
The Seamus Swicherroo

Seamus and the copycat killer share one fantastic ranged weapon, the .50 flintlock. I've heard this branded as one of the best ranged weapons in the game and its damage output is certainly high at 4/6/7, there are other characters that can put out more damage, but that will all cost you more action points. In a single action, I'm struggling to think of a better ranged weapon, and with two of your crew wielding one, you have the opportunity to fell some fairly big opponents.
The downside however is the flintlock is a single shot weapon and its for that reason that this combo can be very useful.
What is the Switcherroo?
The Seamus switcherroo comes from the ability on the copycat's card to allow him to trade places with Seamus for a 1 action. Mistaken Identity is the CCK's only personal spell but is cast on a 9 of tomes, with no resist, it allows Seamus and the CCK to immediately switch places if they are within 15" of each other, which is almost half the board.
When to use
Using the Switcherroo is very situational, but for me there have been four circumstances where its worked well.
"I'll save you master!"
If you have something nasty bearing down on an injured Seamus then a shot from each, and a switch can keep Seamus safe. You'll likely be throwing the CCK under a bus, but hey at least he generates you a corpse counter, so he can come back as a belle or a dead doxy.
"Be a good boy and go be the bait"
A somewhat riskier proposition is to use the CCK as bait, team him up with some chaff to deter any charges and keep him out of enemy fire, then as your prey is bearing down, pull out the Dirty Harry and loose a shot, before switching places and sending Seamus in for the kill.
"Master, it's over here!"
Getting round the board can be a lot easier if you use switch to place Seamus exactly where he needs to be. You could run the CCK up to an objective, or into your opponents deployment zone, and they think you the fool for sending an insignificant totem to do their masters work, but then that 15" switch kicks in and Seamus is exactly where he needs to be with 3 AP to get the job done. This could be particularly useful for something like treasure hunt where it takes two actions to pick up!
"My little friend"
The Resser scheme My Little Friend requires the Switcherroo to be successful IMHO. You need to keep the CCK safe and then use him for the kill. What could be better than switching him into the right place when Seamus has softened up his victim?
Prerequisites
9 tomes for mistaken identity
2 Higher cards for hit and damage for the CCK when firing the flintlock
A high card and a soulstone or a focus action to get Seamus's shot over the line
Other Considerations
Remember both Seamus and the CCK have access to the one action spell 'live for the pain'. Whilst it doesn't have the damage output, inflicting damage will rejuvenate an equivalent number of wounds. Useful for a finishing combo and it'll help the CCK to recover the wounds he picks up from firing that big old hand cannon.
Mighty Minion - The Crooked Man
This is the first in a series of articles that focuses on the relative strengths of some of the Resser minions, the Mighty Minion is my take on the minions that are always going to be on my sideboard at a tournament, because they offer a deeper level of play than their stat card might initially leads you to believe.
So first on my list of Mighty Minions comes the humble Crooked Man, a miner in life and a veritable one man army in the afterlife.

Strengths
- Respectable blast damage with the "cave in" spell.
- "Shafted" spell can kill outright
- Ranged and close combat options to paralyse an opponent
- Higher than average will power
- Crooked and Evasive abilities are great ranged weapon defences
- Slow to die action
Weaknesses
- Movement is a humble 4" per turn, but can be assisted by the Belle lure
- Casting is only 4, meaning you may need to use a few high control cards to succeed in casting attempts
Synergies
- Rotten Belles for lure can move either the crooked man around for extra movement or your opponent around so the crooked man can get the hit in with cave in or shafted
- Punk Samurai can intercept any charge or just wade in if your crooked man gets swamped in combat and has a very respectable melee damage output
- Carrion Effigy can add blast damage or heal local crooked men if it has a corpse counter
- Bette Noir for some pop up melee damage. Focus your crooked men on a single target close to others in a closely packed opponent, get a few blasts off to kill your target and damage anything close, and then bring Bette in for some paired backstabbing action.
Faction Match Ups
- Rasputina - Against the Cult of December, there's some obvious benefit to having minions that can shrug off blast damage and he can dish it back.
- Hamelin/Collodi - Can't have enough blasts when there are so many rats/dolls to kill.
- Lilith & Zoraida - the crooked man's higher than average will power has saved me on a couple of occasions.
Wednesday 24 October 2012
Kickstarter Steampunk and Industrial Buildings
My first foray into Kickstarter came when one io the ever increasing number of terrain kick-starters I've seen came up with something different. Not the usual Tudor or mud house that seems to be the cornerstone of fantasy terrain, nor even the skull laddened bonanza that is GW terrain, this time here were some modest Steampunk and industrial designs that seem ideal for an Arcanist board.


http://kck.st/QxpXjo
Impudent Mortal's Kickstarter had something I wanted and when I looked a little closer I realised it'd be the ideal club terrain, or at the least great mobile terrain. It is solid MDF and best of all he's incorporated a puzzle design so it snaps apart for easy transportation and storage.
I'm looking at the Steampunk, brick and stone buildings and thinking, despite it being 28mm, it'll work well for my planned Arcanist board. Now i just need to track down an appropriate train gauge for the rail line....
Thursday 18 October 2012
Night Terror Conversion
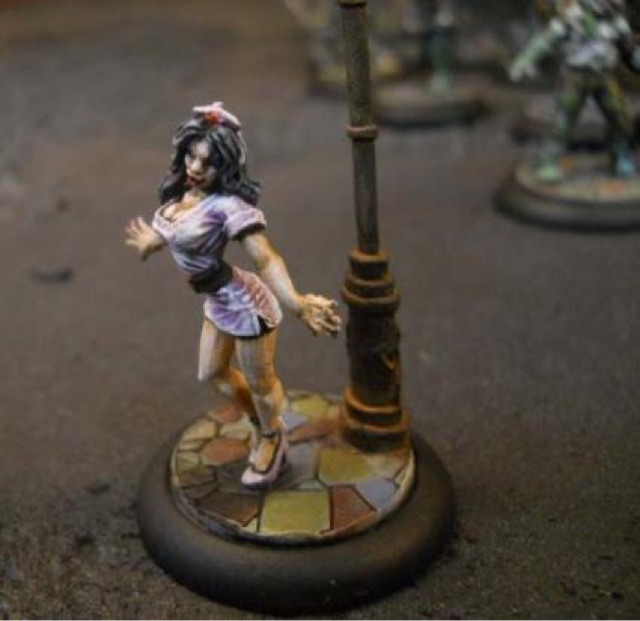
Keeping with the theme of my bases, I had to do something about the Night Terrors being mounted on rocks. I toyed with mounting them on lamp posts but I didn't want anything that tall.
The rocks just looked out of place on the cobblestone streets so I embarked on converting one to be perching on a barrel. I cut away the rock and green stuffed the affected talon before pinning it to a barrel. As I was doing this I was struck the fact that they pose looked like the terror was about to take off and so I repositioned it slightly to look like it was launching itself off.
I had the same intention for the other pose but the more I looked at it, the less confident I was, so I reshaped the rock more like a tree stump. Whilst I'm not a overly happy with how this one turned out, in my mind its still easier to explain away the tree stump in the cobbled street than the rocky outcrop!
Conversion

Original Pose

Dead Rider Conversion
Another quick conversion I did was on my Dead Rider. The original sculpt has one hoof on a rocky outcrop, whilst I like the pose, the outcrop would have looked out of place on the cobblestone streets I'd based my crews on.
I cut the leg from the outcrop and then pinned it to a broken barrel I had in my bits box. I then bent the leg ever so slightly to get the new pose to fit anatomically.
Conversion


With this mini I decided to also take the precaution of repositioning the horns so that the point of the horn flowed back more towards the saddle. I had the horns in the original pose but they were very loose and beyond my ability to pin so this alternate pose just gives the horns two contact points and provides a stronger solution
Original Pose

Graveyard Spirit Conversion
Just a quick post to show off a simple conversion I did on my Graveyard Spirit to give it a bit more menace. Of all the totems, this is the one I'm likely to run. I kept forgetting that the Graveyard Spirit has a reasonable damaged output for a Totem, so I wanted the mini to remind me of that fact.
I thought the existing pose with hammer being held limply in front was a bit naff, so I cut the hammer from the body, gently repositioned the arm and then filed the body back. I had to add a little green stuff to bulk out the hammer again but otherwise I think this works nicely.
Conversion

Original Pose

Wednesday 17 October 2012
Some Construction Required - Seamus and his Belles
I have to admit that I really enjoyed the challenge that returning to metal brought when I went from my GW to my Malifaux crack habit. Now all of a sudden I was pinning every model and really considering every conversion. Plastic kits had made me lazy and then along came Wyrd's minis and it forced me to up my assembly and conversion game.
Nonetheless, not every mini is equal and some proved particularly challenging. This then is part 1 of my list of Resser minis I think you should take extra care or put extra time aside for when assembling.
1) Seamus & Avatar Seamus

That right the mad psycho himself is first on my list. The original pose Seamus really only has one assembly point, where his bag of tools attaches to his right arm. Be sure to pin this because it'll be a very dry joint otherwise. You'll need extra time because that arm needs to be gently cradled or held in a vice whilst you slowly drill into it. The bag of tools is straightforward to pin and is probably the hole you want to drop your pin into.
Avatar Seamus being part resin and part metal presents slightly different challenges. The resin around his feet, shoulders and backside will need liquid green stuff applied and you may want to consider pinning his metal fist to that resin arm. Take the time to round and dry fit the fist until it sits well and looks natural.
Lastly turn your attention to his metal pocket watch. This should wind around his hip and fall between his legs. Gently bend the chain until you have it fitting well, dry fitting until you're happy with the position, and then glue a good portion of the chain along his hip to avoid it snapping off.
2) Belles
By far the biggest construction point about the belles is where the parasol shaft connects to the canopy. You'll want to gently drill out the canopy connection point so the shaft has a greater contact point. Be sure not to drill to far or you'll have a hole in the top of you canopy.
You should look in particular at this pose and decide upon how to reinforce the connection of the elbow to the torso.

I did this mini twice (can't have enough Belles). The first time I was lazy and just applied a bit of extra glue at the point the shaft went over her shoulder, whilst its quick, it's a weaker join and might ultimately fail. The second time I did this mini I took the time to pin the arm, it wasn't easy and it took a while but it was totally worth it.
So that's it, this first article should get you through the Seamus boxed set, subsequent articles will talk about some of the other little challenges awaiting you as you expand your collection of Resser Masters and Minions.
Nonetheless, not every mini is equal and some proved particularly challenging. This then is part 1 of my list of Resser minis I think you should take extra care or put extra time aside for when assembling.
1) Seamus & Avatar Seamus

That right the mad psycho himself is first on my list. The original pose Seamus really only has one assembly point, where his bag of tools attaches to his right arm. Be sure to pin this because it'll be a very dry joint otherwise. You'll need extra time because that arm needs to be gently cradled or held in a vice whilst you slowly drill into it. The bag of tools is straightforward to pin and is probably the hole you want to drop your pin into.
Avatar Seamus being part resin and part metal presents slightly different challenges. The resin around his feet, shoulders and backside will need liquid green stuff applied and you may want to consider pinning his metal fist to that resin arm. Take the time to round and dry fit the fist until it sits well and looks natural.
Lastly turn your attention to his metal pocket watch. This should wind around his hip and fall between his legs. Gently bend the chain until you have it fitting well, dry fitting until you're happy with the position, and then glue a good portion of the chain along his hip to avoid it snapping off.
2) Belles

By far the biggest construction point about the belles is where the parasol shaft connects to the canopy. You'll want to gently drill out the canopy connection point so the shaft has a greater contact point. Be sure not to drill to far or you'll have a hole in the top of you canopy.
You should look in particular at this pose and decide upon how to reinforce the connection of the elbow to the torso.

I did this mini twice (can't have enough Belles). The first time I was lazy and just applied a bit of extra glue at the point the shaft went over her shoulder, whilst its quick, it's a weaker join and might ultimately fail. The second time I did this mini I took the time to pin the arm, it wasn't easy and it took a while but it was totally worth it.
So that's it, this first article should get you through the Seamus boxed set, subsequent articles will talk about some of the other little challenges awaiting you as you expand your collection of Resser Masters and Minions.
Product Review - Battlefoam X-Display and Fury boards
I am at heart a cautious person and after being involved in the running of a dozen or so tournaments for my local gaming club, the one area I really feel some gamers underestimate is the risk to their beautifully painted minis in a tournament environment.
I've literally seen minis worthy of a Golden Demon go into orbit at a tourny because the poor guy was dodging another player as he made his way between tables. It's always heart wrenching when you see a beautifully painted crew shattered into a bizillion pieces and it was because of that that I decided I needed the Battlefoam X-Board and Fury tray in my life. Even though at the time of writing, I haven't attended a single tournament, my cautious side was screaming that I needed that protection, or rather my minis did.
It was particularly important to me because so many of the tourneys here are single faction, meaning you could have multiple crews laddened up as you traverse a room of gamers all trying to do the same.
But anyway onto the review.
So I'll point at the start that this review actually covers two products from Battlefoam, the X-Board Display (hereafter called the XB, because its a bit of a mouthful) and the Fury.
Battlefoam X-Board Display Board

Battlefoam Fury Tray (one of two tray insets shown)

Starting with the Fury, this was originally designed for WarMachine and Hordes players and includes set recesses for 30mm, 40mm, 50mm and some even bigger base insets. It'll even hold a Collosus or whatever those hulking great things are called in WarMachine. Unlike many other display boards the Fury is specifically designed with insets for your minis, it isn't a display board per say, think of it more as a carry tray on steroids.
The Fury comes in a rugged black plastic design with two trays and a set of carry handles, which snap onto the sides.
It can be combined with XB's rails to allow you to combine the two fury trays into a single tray, changing the number of minis that can be carried from approximately 40 for a single tray to 80 for both trays.
If you go to tourneys which are fixed master or fixed list you probably only want the Fury system. The minute you start going to brawls, single faction or multi master you need the added functionality to connect trays that only the Fury and the XB package provides.
The XB by comparison is a fully featured display board. It comes with two textured tiles that when combined provide a centre step or two separate raised levels onto which you can display your minis. Provided in ruggedised plastic, the textured tiles can easily be undercoated and drybrushed to provide a nice landscape to present approximately 30 minis against. You might be able to squeeze a vehicle in there if you we're playing something like 40k but the more minis you add to the top, the less it looks like a diorama and the more it looks like a carry tray.


The XB is held together via four support rails, the longer ones, designed to run along the front and back have an inset where a name or army tag could be mounted. The short side rails have comfortable hand grips you'd use when moving it around in a tournament setting.
The XB also comes with a cotton carry bag you can use for storage, although it will only carry one set of trays, either those from the XB or the Fury. It doesn't have a carry strap either which kind of defeats its purpose.
When fitted together these boards will form a single solid unit that isn't coming apart without some brute force. I tried out both XB and Fury insets in the XB rails when I got it and its was a struggle to pull apart. It might have been where it was brand new, but it was definitely a struggle.
The XB has a one inch grid layout under the textured surface which is advertised as being ideal for you to fit magnets to, so that your magnetised minis wouldn't move if the tray was knocked but I think in reality most gamers wouldn't go to that extreme because you'd be unlikely to use the same lists at each tourney. The fury might be a batter candidate for magnetisation but I'm not sure it would offer you much more protection than the recesses already do. Even I, probably the most cautious Resser on the planet wouldn't necessarily magnetise these trays.
So to sum up these products in terms of pros and cons and to give this a rating:
Pros
Very rugged design in both products,
The XB has a very nice little textured tile setup that is generic enough that it works with any system and detailed enough that it only needs a quick drybrush to be ready
The XB front rail has a nice inset for a name/army tag
The Fury's recessed style offers protection from the tray being knocked
Both trays can be magnetised
Cons
The carry case in the XB needs a carry strap
The rugged design can be difficult to break apart, unless it eases up over time, I'd probably leave it in the same configuration.
Rating
4.75 out of 5 - All up, these products are super cool and fit a niche nicely, whilst there are cheaper alternatives becoming available, the is no doubt Battlefoam have a winning design.
Tuesday 16 October 2012
On the subject of commission painting
So here's the part in the blog where I make a confession. For those of you looking for painting inspiration I have to say right up front that at this time I am using commission painting services to bring my minions and masters to the board.
As some of you will have glistened from my profile I work for one of the big 4 consultancy firms and that takes its toll on your free time. I quite regularly pull 12-15 hours days for my job and being in IT means that any remaining time really should be spent keeping up to date on the latest trends.
This when combined with a relatively busy family life, and heavy involvement in my local gaming club, means I'm lucky to have 6-8 hours for gaming a week, which most of you will know probably only equals one or two I painted minis.
I take no pride in fielding a commission painted army, I used to find painting very satisfying and relaxing and I was pretty good at it, but the reality is that painting your own crews is a time consuming business and I have to accept that for now, commissioning my crews is the only way to go.
Thankfully Malifaux is one of few games where I can probably get away with a commissioned crew in a tournament setting. The gaining grounds tournament outline is very clear on how painting should be awarded and it doesn't factor in an overall score. This is a pretty shrewd, meaning that a commission painted crew still has a shot at a podium finish, you just won't be picking up best painted. Or you shouldn't... I go to extraordinary lengths to point out my crew is commission painted and I hope others do as well.
So onto commission painting itself, if you're reading this and considering the option then I think there are a few things to consider, namely:
1) Prepare well enough in advance, your minis may be away for a while, you need to have a proxy substitute available and you need to ensure you get into the busy schedules of those artists willing to undertake the work
2) Pick your artist based on their talents and a style you like. Don't rush to the first available and don't rely on a friend just because they have talent. The easiest way for a friendship to fold is because money or resentment becomes an issue.
3) Consider how much of the process you want to do yourself, the more you do, the less it'll cost and there's a sense of reward you get from being involved in the process yourself. For me that meant all minis were assembled, in some cases converted, were based and undercoated. Given how detailed and fragile Wyrd metal minis can be, doing your own assembly work can save you time and heartache.
4) Make sure you have the budget and make sure the cost of the work is agreed upfront. It shouldn't feel like your visiting a dodgy mechanic, whose going to have your minis up on the ramps before scratching his head and proclaiming that there's a lot more work here than originally thought and its going to cost you double.
5) My last piece of advice is to ensure you are involved in the creative process from the very start and all the way through. You are after all the client and these will be your babies, the last thing you want is for them to be screwed up. Even if you want your minis painted exactly as Wyrd painted them, you want to be involved often and always to ensure what you get at the end meets your expectations.
For me the path of choosing a commission painter was a long and convoluted one until I settled on Blue Table Painting. Here in Western Australia my local choices were fairly limited, and in one case had run up a reputation for not finishing or returning projects! I turned to the national scene and found a group of commission painters hanging out on Wargamer AU, but when I posted there was little availability and I wasn't overly inspired by the responses I received.
It was at that time that I turned to Blue Table Painting, a company in Utah who have made a reputation by applying a business standard to the commissioning of painting and assembly services. I'd used BTP once before and I'd been delighted by the result but this time I was asking them to paint 40 minis in under a month to a much more detailed level.
I have to say I can't recommend the services that I received enough. Zana, the artist assigned had a real passion for the work, Josh, the Art Director, did a fantastic job on following up on my instructions and checking the details, and the whole process was flawless from start to finish.
Now this work was undertaken at levels 6&7 on their scale and you have to understand that this is approaching but not quite the love you'd see put into a mini by Wyrd's painters to have it published on their website or packaging. If you engage any painter at a lower level you need to reset your expectations, don't expect a Golden Demon when paying $15 a mini.
The net result for me was a crew I'm proud of, but that I consciously tell everyone was commissioned.
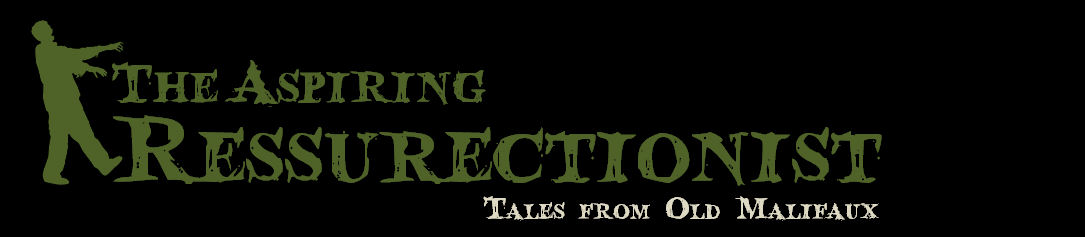
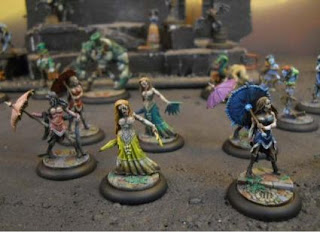
Below us a link to the youtube vid BTP did of my crew and some pics from the gallery of acceptance photos they take for every commission they undertake.
Again I can't recommend BTP enough but good luck regardless of who you choose!
Monday 15 October 2012
Laminator fumes, and other water cooler moments
So in my local scene we tend to laminate our cards, I know others buy those little card protectors but for me it's all about the laminator fumes!
I miss those days of thumping open a new box of plastic crack and staring at the sprues, working out my conversion possibilities.
I'm sure Wyrd, with their move to plastics will offer me those days again but for now I contend myself with warming up the laminator and inhaling the fumes as another batch of the undead brigade is put through the ringer, then snipped, cut and filed ready for theory hammering or even a bit of play down at my local club.
The laminator has even become something of a water cooler for the Malifaux addicts at my local club, we circle the machine as it goes about its business in that slow rumble that tells you another sheet of gaming goodness is making its way into the world.
That laminator silently ushers in, with a collective sigh of approval, more minions, more combos and more opportunities for our collective crews.
It's a source of hope and despair and its always in motion, as this pic proves!
To Avatar or not to Avatar
My hobby time at the moment is divided between preparations for my first tournament, later this month and where should I be focusing after the tourney finishes.
Here in WA there are probably only two or three Malifaux tournaments a year and after this one they'll be a bit of a dry spell before another one comes along.
I've been thinking about which masters I want to add to my already burgeoning supply of Resser minions. At the moment I have Seamus and Molly and I'm about to add Kirai and Nico to my list. After that I think I'll be looking book 4 stuff before I finally go back and add my final master mcmorning. Not sure what is about mcmorning, maybe it's the mini, maybe it's his choice of minions but he'll just have to wait.
I'm also starting to explore the avatars, so far Seamus is the only one I've avatar'ed and it strikes me that there's a time and place to go avatar. I've taken him in two games, the first going avatar didn't really help me and in the second I forgot his triggers for a turn and it cost him his life!
So to avatar or not to avatar that is the question....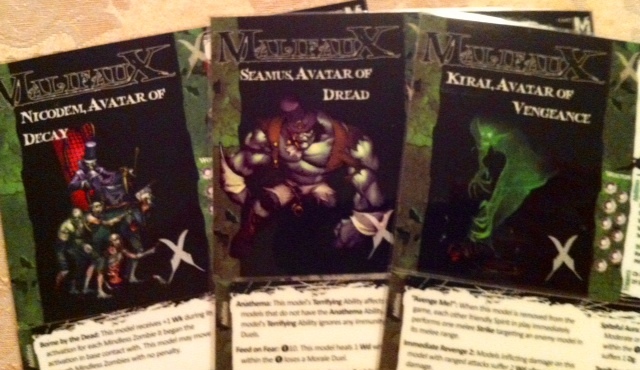
And so it begins
I'm starting this blog in an effort to keep all of my random thoughts and experiences related to my Malifaux journey in one place and in one context. My name is Paul and for almost 18 months now I've been addicted to Malifaux!
This then is my blog, my journal, my random scribblings for I'm an Aspiring Resurrectionist, a guy with aspirations of earning a title in this gaming system, becoming a better player and most importantly in having a bucket load of fun along the way.
I can't promise this blog will be a shrine to my minis, I am a reasonable painter but I simply don't have a lot of time. Nor will it be a tactical knowledgbase because I'm no theory hammer extraordinaire either.
I am at best an Aspiring Resurrectionist and this is my journal.
Subscribe to:
Posts (Atom)